
Your First Mountain Biking Experience
Some people get into mountain biking because they have a death wish; some others because it’s cool. For me, it was oddly that road biking had become too unsafe after I moved to Colorado. I had been road biking for decades, in one year racking up over 7000 miles on my bike. Then I moved to San Diego and car culture became synonymous with road rage, but I had surfing as a distraction from cycling. When I moved to Denver, the snow season was too short to fill my year and I needed something new, but I heard horrible things about accidents involving cyclists and motorists.
If you go to a mapping site and enter the coordinates (39.6821310019527, -105.17503039322727) in satellite mode, you may notice a little memorial. It’s a bicycle painted in white, frequently adorned with flowers. Sometimes there will also be a heart on the nearby highway with the word GWEN in it. The memorial is for Gwen Inglis, a cyclist that was fatally struck by a driver in 2021. (Note: of course the City of Lakewood wants the memorial removed. Sigh.)
That type of incident is too frequent. In particular, the roads around here are full of aggressive drivers that seem to consider cyclists a nuisance. The very intersection that follows the memorial above on the East side is notorious for drivers making right turns on red without stopping, endangering crossing cyclists.
But it wasn’t all about safety: I also had many new friends that were inviting me to go mountain biking with them. They were very passionate, although the constant stories of tumbles and misses were not very reassuring. Should I try or not, was the question.
What is Better: Road or Mountain?
Fast forward to now: my faithful, beautiful road bike sits in its cradle and I constantly go out on my equally beautiful mountain bike. Why? Because mountain biking combines the benefits of cycling with the need to solve puzzles on the way. I find it challenges me intellectually in a way road biking doesn’t, and that’s enough for me to switch.
The goal of road cycling is to get a good workout. You choose a safe route with known obstacles and follow it. The more predictable the route, the more you can focus on your workout. What matters is power, cadence, speed, mileage. You can feel the blood pumping through your legs, you can sense the muscles tensing, you look forward to the calves twitching on their own at the end of the ride, when you calm down. They just can’t believe they are supposed to be done and continue working.
But unless your mind is distracted with something else, road cycling becomes boring. Which is where mountain biking comes in: you have to work out, but you also have to constantly monitor what’s going on: trail conditions, approaching traffic, state of the surface, surprising changes in direction and inclination. Mountain biking is not as attuned to a workout as road biking (because half the time you don’t even have to push, as you go downhill), but it’s a much more entertaining sport. You need to figure out things, you are engaged, and you can’t let your mind drift.
How Did I Make It Happen?
I do teach friends how to snowboard, but I would never teach friends how to mountain bike. That’s because trying to watch someone else while riding is dangerous, and because the wait for a newbie rider is simply intolerable. Also, generally people know how to ride a bike, and adding the mountain component is something you can definitely figure out on your own, and someone else’s help is not all that important.
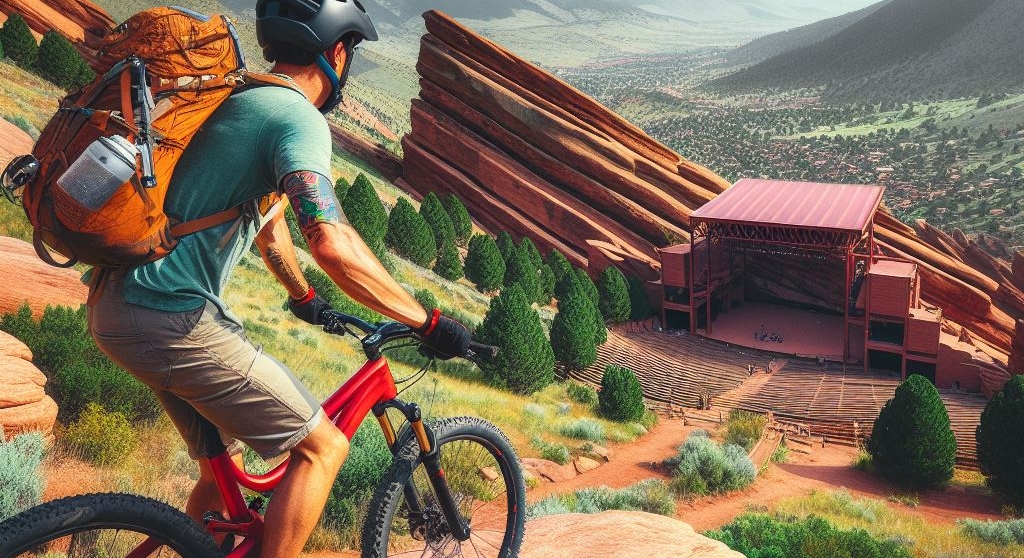
The first thing I wanted to know was if I would enjoy riding mountain trails, at all. I was lucky enough (by choice) to leave near a good trail system, that of Green Mountain in Lakewood Colorado (the mountain on whose flanks lies the memorial mentioned above). So all I had to do was to get a mountain bike. I chose a cheap Walmart bike for $150 and rode it, thinking I could use it in case of emergencies.
I rode the easiest trail possible on the mountain, the South side of Green Mountain trail, and the “ascent” kicked my butt. Part of it was being out of cycling shape, since I hadn’t really done much of it since before San Diego; part of it was the cheap and incredibly heavy bike; part of it was that road cycling rarely entailed climbing for me.
Still, I loved the experience. The fresh air was amazing, the feeling of dirt under me instead of road surface was great, and the lack of cars was divine. I was going to stick with it.
My First Mountain Bike
I went online and looked at possible bikes and found the first major hurdle: mountain bikes of any quality are insanely expensive. I had friends who boasted of their $7000 bikes, but then ended up being more concerned about the bike’s welfare than their own and lived their entire existence in fear that the bike might get stolen.
I ended up choosing a bike from Amazon. It was drop-shipped from China and a huge gamble: I spent $1200 on something that had only a handful of reviews and an unclear return policy. It turned out an incredibly good investment, but the company isn’t selling them any longer, and for good reasons.
The problem with mountain bikes is that a failing part can result in major injury. This is while parts are generally subjected to much more abuse. Say your chain: on a road bike, it usually experiences near constant torque. You use the same force throughout, with the exception of when you start and go downhill. On a mountain bike, the torque used to go uphill is much higher, making the chain more vulnerable. And in fact, you’ll have to replace the chain every so often, depending on use.
Now, if your chain fails on a road bike – something already less likely – then your bike stops. In the worst case scenario, the chaing tangles itself in the rear wheel and you suddenly stop and keel over. If you are riding at speed, that can cause severe abrasions to the side of you that skids on the road. It happened to me and it’s neither pretty nor painless.
Consider the same on a mountain bike: you are riding somewhere and the chain busts. You keel over, either because of the same as above or because you suddenly lose power on an uphill. As a result you keel over – but there is nothing where you keel over to. Instead, you start falling into a ravine.
The end result of that differential in medical emergency potential is that mountain bikers need to be able to trust their bike mechanically a lot more than road bikers. Which means that buying cheap bikes is dangerous.
My Second Mountain Bike
After a while, it felt like I had replaced all parts of the bike. It started with the chain, that busted in the middle of an easy ascent. There were the shifters that got gummed up because the mud seals had fallen out. The brakes failed because the rotors were made of cheap material. The last straw was the front fork, which cracked to the point the wheel was out of balance. I made it home safely, but it could have ruined my day if the crack had widened and I had fallen over.
I wanted something more stable and secure. Better parts, but not a car’s worth of money. Safety, not luxury. I didn’t want to impress my buddies, just ride safely.
I ended up ordering a bike from an outfit whose name I will not mention because they took my money, then told me they couldn’t deliver months later. One of those lovely behaviors that presaged the aftermath of 2020 as corporations deciding to do whatever they wanted because they were not afraid of upset customers any longer.
I went back after retrieving my money (fortunately not an arduous process because the first outfit knew they could sell the bike I ordered for more money to someone else in the COVID outdoor craze). I was lucky enough to find a supplier, bikesonline.com that had a bike in stock that really appealed to me, and I got their T7. It cost me 25% more than it costs now, but we were talking about crazy times. And I am absolutely happy with it.
What About the LBS?
To a cyclist, the abbreviation LBS stands for Local Bike Shop. It is usually as much an institution of learning as it is a point of sale. It’s where sales associates are also avid riders, where the banter revolves around the best trails and the best parts. Because staff is usually not just knowledgeable about cycling, but also passionate, you can get amazingly good information, specifically about local conditions.
The LBS was always a bit of an elitist institution. I frequently saw beginners being scoffed at or ridiculed behind their back. I particularly remember this very famous bike shop on the San Francisco Peninsula trying to downsell a customer because of availability. The customer wanted a top-of-the line drivetrain, which the shop didn’t have in stock. The clerk, trying to land the sale, told the guy in an exasperated tone that the only difference was weight, and that he could save a lot more of it by simply eating a few cookies less a day.
The LBS has also had to suffer from online competition. In a different article, I mention the Castle Defense, the common reaction to the onset of competition by increasing prices to keep revenue constant under threat of reduced sales. As more people buy online, LBS bikes get more expensive because the profit has to be constant. The result is that LBS prices have gone up where online prices have gone down.
To make things worse, LBSs cannot bank on their most important advantage reliably. An online store by its nature cannot efficiently repair a bike, so going to the LBS makes more sense. Some people feel uncomfortable taking a bike to a shop they haven’t bought from, so that naturally would increase sales there. Sadly, as a result of adjustments to staffing because of reduced sales, repair times at local LBSs have gone up so dramatically that you are pretty much forced to learn how to fix your bike. In 2021 the LBS quoted me a repair time of three months for the fork I needed replaced – and was proud of the busy-ness. I ended up buying the fork online, learned on YouTube how to replace it, and never set foot in my LBS again. Because I didn’t need to (since I had learned the important skills), but mostly because I didn’t want to.
This shouldn’t dissuade you from checking out your LBS! The format is still brilliant: in theory you can get amazing advice from dedicated enthusiasts that is specific to the trails your are actually going to be riding. Just be wary of conflicts of interest between sales and advice, and inquire how long it would take to repair a bike. In fact, that’s how you could start: ask how long it would get to get a basic repair done on your existing (potentially fictional) bike. Pick something that doesn’t immediately mark you as a noob – no tire or chain replacements, but maybe the fork replacement I mentioned.
What Bike Should You Buy?
The first question you need to ask yourself is where and what you are planning to ride. I have seen a lot of advice that is specific to conditions on someone’s trails that don’t translate to someone else’s conditions. For instance, my local geology is full of loose rocks: gravel and crushed rock. Green Mountain in particular is mostly a large alluvial plain, which means a river fanned out here eons ago and left clay and smooth gravel everywhere. The result is an incredibly bumpy ride – to ride Green Mountain, you should get a bike with dual suspension!
If you ride on slickrock, which is solid rock surface that is weathered into smooth patterns, you are not dealing with a bumpy ride. By getting a bike with single suspension (a hardtail in MTB parlance), you shave off cost, but also weight (the second suspension is pretty heavy) and potential breaks/maintenance. The same is true for pure clay trails, which are mostly smooth with the occasional root tripping you up.
What you buy depends largely on where you ride, and even then on what you ride where you ride. You can get an idea of what’s popular around you by checking online forums with local components, or by going to the LBS and checking out what they sell there. Pay particular attention to sales items, there, since they generally are the bikes that are selling unexpectedly poorly.
All the Nerdy Stuff
The description of bikes – both online and at the LBS – will be chock full of technical jargon that you may not understand well. There are frame geometries, drivetrains, shifters, fork travel, break pistons, wheel and tire sizes, and a plethora more decisions to make. Eventually, you will learn the jargon and the differences, but it’s pretty pointless to explain all of it before you even went on a trail for the first time.
The good news is that you don’t really have to know all that. In most cases, bike manufacturers sell well-balanced bikes where they assemble coherent sets of components. Your basic bike will have all basic components, your mid-range bike will have consistently mid-range components, and so on.
How do the differences in components matter? There is a quality aspect to it, but there is a more important (to you) performance aspect. If you get a very basic bike, you may have a 3x7 gear setup that gets you a 400% gear ratio. On a mid-range bike, you get a 500% gear ratio. That means absolutely nothing to you right now, but on the trail it means that you won’t be able to ride your basic bike on the steepest uphills, while the mid-range can do it.
A basic bike might have a 100mm front shock travel, while a mid-range might give you 140mm. Means nothing to you, but when you zoom downhill, the 100mm shock will hit much faster and much harder than the 140mm, which means your ride will be very bumpy just when you are not in the mood for sudden jerks.
Why Prefer Mid-Range Bikes?
My process of getting familiar with a new sport has me first get used or cheap gear, then upgrade it when I get better, because I know more about what matters to me specifically, and because I am most likely to break things when I am not familiar with the sport. That has been true for any sport I have mastered – from snowboarding to cycling, to surfing, to running.
In hindsight, though, I think I would have preferred starting out with a mid-range bike in the mountain biking arena, because the risks are much higher. A cheap snowboard will maybe slow you down, or be inflexible. Even if it’s of poor quality, it will just break and you are out a day on the snow. A cheap surfboard will ding easily or not be able to catch marginal waves. But a cheap mountain bike might easily cost you broken bones.
Also, while it is definitely the case that I used to have spills on my mountain bike more often in the beginning, I know I am not immune from them now. I can go days without a bad fall while snowboarding, I never have any issues with a surfboard, but mountain biking is special, in that a crash is likely at any point in time. So you don’t really save a good bike by waiting to buy it later.
What About E-Bikes?
A lot of mountain biking aficionados absolutely despise e-bikes. They feel like cheating, and e-bikers have a bad reputation for being a nuisance on the trail. I don’t think either of those things should prevent you from getting an e-bike.
First, technicalities: an e-mtb is a mountain bike with an assistive electrical motor. When you push the pedal, the motor gives you a boost. When you brake, the battery is replenished. How much the boost is usually depends on what you tell it to do. The parameters of the choice are mostly how hard you want to push vs. how long you want to ride: the harder the motor needs to help you, the faster the battery will run out.
Is it cheating? Not really, you choose the sport that you want to do and if you don’t have the power to climb the local trails, an e-bike is a great way to get there. You can reduce the output as you improve your riding until you only compensate for the extra weight of the motor, and then you are on par with an unassisted biker.
It is true that e-bikers can make themselves a dangerous nuisance, and you should absolutely read this if you plan on getting one: because you can ride uphill at the same speed as downhill with the assist, you’ll be able to pass a lot of uphilling bikers. And, mind you, the problem is all on the uphills.
The problem is that passing people is one of the more dangerous situations on mountain biking trails. The trails themselves are generally narrow and passing requires cooperation. Fortunately, it’s relatively rare that someone has enough power to pass you outright even on the busier trails. But that changes when e-bikers start passing. Suddenly, the number of times the dangerous situation occurs is multiplied, and terrible things happen.
There is an easy solution: don’t use your e-bike to pass people on uphill trails, unless you turn off the assistive motor. There is really no good reason why you should pass someone if you can only do so because you are pushed by an external motor – it’s not like you are cheated of a workout, because you already chose that to happen.
What Do You Need After Getting a Bike?
Notice I wrote getting instead of buying: you should seriously consider renting your bike for your first few outings. Many LBSs have rent-to-own options, and if you find a bike you like within your budget, then this could be a good way to get introduced to the sport.
So, now you have the bike and you want to ride. What do you need? Here a basic selection:
- Helmet
- Gloves
- Patch kit
- Pump with gauge
- Padded shorts
- Shoes
- Water bottle
- Tools
- “Medicals”
Absolutely do not even dream about riding without a helmet. Think about a fall from a mountain bike: your bike falls to the side with the tires still on the trail, and your head is the fastest thing that moves. It smashes into a rock and you are done. It’s physics, it’s sports medicine, it’s potential death. Even if you don’t die, you’ll still be in the middle of nowhere and it will take emergency responders forever to get to you, and an infinity of forevers for you to drag yourself to the trail head.
What helmet you choose is up to you. Fortunately, there are safety standards for helmets that are enforced at a government level, so any helmet you buy from a reputable source is likely to be safe enough.
Gloves are very important because they protect your hands in case of a spill. Also, they protect your hands in case of a bumpy ride. Also, they ensure a buffer between your sweating and the grips, so you don’t slip on them. There are no safety standards for gloves that I know of, but anything with a padded palm and a way to tighten the wrist should be good enough.
Patch kit and pump are useful if you have a flat. Mind you, this is important with any cycling so you don’t have to stop your ride just because of a flat. The big difference with road cycling is that you generally can’t call an Uber/Lyft/etc. when you are stranded, because you’ll be somewhere far from civilization. Take that into account, since walking down a trail for hours because you can’t fix a simple patch is absolutely maddening, and patch kit and pump and lightweight and cheap.
Padded shorts are vital. You can ride with clothes that are not padded, but the pain is atrocious after a while. Maybe your first rides, since they are probably short, can do without. But as soon as you know you want to ride for good, make sure you have padding. Bike shorts with a chamois are very popular, I prefer padding inserts that you wear as underwear under shorts. That’s mostly because I generally wash the underpadding more frequently than the shorts. In colder climates, you can also wear regular bike shorts under mountain biking shorts for extra warmth.
Shoes are necessary, the kind of shoes relatively unimportant. You absolutely need shoes that are resistant to mud, rain, and the elements in general. They should be lightweight because you have to move them uphill. The soles should not have soft padding because that will inhibit the transfer or power to the pedals. You can go anywhere from lightweight trail running shoes to dedicated road cycling shoes, it’s really just a matter of personal preference.
Water bottle or hydration bladder. You will generally not find water on the trail, so you need to make sure you have enough to hydrate on your own. You can place your hydration wherever you want – a bottle on the frame, on the back of the saddle, in a backpack. Just make sure you bring enough for your ride. The consequence of not having enough hydration is loss of concentration at the very least, which frequently results in accidents.
Tools are very important, because you never know when a bolt will unscrew or a crash misalign something. They sell very nifty toolkits that you can carry with you where you put the patch kit. Some even attach inside the crank shaft, super cool!
“Medicals” I usually bring at least some ibuprofen with me and a first aid kit consisting of tweezers, band aids, and antibacterial cream. You should switch out the ibuprofen for something you tolerate better in case it doesn’t work for you, but the “scrape kit” is an essential to me. The tweezers are super useful in removing thorns and rocks, the antibacterial cream applied immediately makes recovery quicker in my experience, and the band aid prevents more stuff from getting at a wound.
Learning to Mountain Bike
Mountain biking has three independent components:
- Cycling technique, which includes stability, precision, start, stop, and gear shifting
- Mountain biking rules, that govern who is expected to do what where and when
- Trail specifics, like avoiding obstacles, making tight turns, and getting over lips and ledges
What makes mountain biking difficult is that all three require separate skill sets, and yet you have to use them all at the same time. For instance, you will need to check the trail ahead constantly to make sure you see obstacles and internalize how to avoid them; at the same time, you have to keep an eye out for other riders or hikers and wildlife and forks on the trail. You need to do both simultaneously, which makes it harder.
The easiest way to learn it to focus on cycling itself first. Choose a deserted road for that, possibly one with a steep grade, and learn to ride it. You want to learn to start uphill and stop downhill – which is fiendishly hard at first, if you ask me. Then you learn stability and precision by adding trail markers like pebbles or plastic cups that you have to steer around. Finally, you learn the particular sequence in which you have to shift gears – you need to shift ahead of upsloping, because once you are pushing the bike, it’s harder to change gears. Also, you need to learn how to shift very quickly and precisely, as changes in slope are a constant in mountain biking.
When you are not actually riding, familiarize yourself with the rules of the trail. Those are not terribly complicated, but not minding them can put everyone at risk. The short version is:
- Everyone has priority over mountain bikers: hikers, joggers, horse riders, people with strollers, people without strollers; you have to stop for them and get off your bike unless they indicate otherwise. Motorized vehicles are the exception, although you probably want to be careful of those as they are more dangerous to you than you to them
- Uphillers have priority over downhillers: it’s so much harder to start riding when going uphill than going downhill that this is simply a matter of need; notice that the need is only present for sufficiently steep trails, but the rule is generally followed even if the trail isn’t – you need some kind of way to decide who stops and who can go, so this steep trail rule is extended to all trails. Please note that the uphiller may have a hard time going up and may suddenly jerk to the side and into your downhilling, so unless you are sure the situation is safe, stop and get off your bike until the uphiller has passed
- Never stop in dangerous places such as where** (a) you cannot be seen; (b) you block the trail; (c) the trail forks or crosses another trail. If you have to stop there, get off the trail as quickly as possible
- When trying to pass another rider, wait until it is safe to do so. Communicate with the other rider to make sure they understand your intent, wait for a place where the both of you can easily start again (just not a steep uphill), and live with it if the other rider is an idiot that doesn’t want to be passed
- Pay attention at all times No, “I was listening to music with my earbuds on” is not a valid excuse for hitting someone, and not bringing headlights when it’s dark is neither. You need to know what’s going on because not paying attention can cost people’s lives
When you are done with all that, learn the trails. You’ll want to start easy and usually trails are marked with difficulty ratings. Those are taken from skiing, so there are easy green trails, followed by intermediate blue trails, and then advanced black trails.
You start on green trails. They usually are relatively smooth, relatively flat. You may encounter rocks or roots, but you won’t find a rock ledge you have to jump over or a steep hill that you’ll end up having to push. This latter one depends a lot on your fitness level, so you might get mightily winded even on the greenest trail at first.
You should get bored with green trails after a while and graduate to blue ones. Here you’ll find steeper trails, trails with more obstacles, and trails with variable conditions. You’ll slowly learn what technical riding is about: the ability to overcome obstacles that a regular cyclist wouldn’t know how to handle. That can be a switchback too narrow for your bike to turn around at any speed, or a rock ledge that you can’t simply power over, or a jagged section of rocks that you can’t ride across. But you’ll get there a while after this guide’s helpfulness has ended.
Finding Trails and Getting There
Not everyone is crazy enough to move to a place specifically because there are lots of trails in riding distance, so you may want to know how to find trails and how to get there.
There are many sites that list trails, but MTBProject is definitely a good one for my locals and USA-wide. Trails have descriptions, ratings, and recommendations. Plus there is a trail finder where you input your parameters and filter. Currently, in the interface you first select a location (that will not be taken literally, so if I input “Lakewood, CO” it will show me all of the Front Range of the state). Then you specify the difficulty of the trail, the duration that you’d like, etc.
You can also ask locals for a good beginner trail, including at the LBS. They might even give you a good idea of where and how to park your car if you need to drive there, and what things to look out for. The best beginner trail where I live, for instance, is the trail system within Bear Creek Lake Park. The best place to park there, though, is not easily found on maps, only locals know it.
Once you know the trail you want to try, you need to figure out how to get there. If it’s more than a couple of miles to the trailhead, you may want to take your car, which means you have to figure out how to carry your bike in/on it.
For a beginner that doesn’t have to drive far, I found that the bike carriers sold for cheap as trunk mounts work pretty well. They are solid, stable, and allow for driving at even freeway speeds. A hitch mount is more stable, but also factors more expensive and permanent. If your vehicle is big enough, you can possibly place the bike inside, especially if you remove the front wheel.
“Warm Tips”
If you can, find someone else to go with you on your first outings. As always, the first few times you do something new are usually the most dangerous and having someone there that can alert emergency rescue in the worst case can be very helpful, even vital.
Try small before going big. This is particularly important for trail length, because you’ll usually have only half the work done by the time you feel tired, since you then also have to go back. Choose trails that tend uphill first (so you get the easier half at the end), choose trails that loop, so you get to end faster if you continue than if you retrace after the half-way point, and maybe choose trails that don’t leave major roads for much distance.
Don’t be afraid to stop and walk. Maybe it makes you feel bad to walk where everybody else is riding, but there is no shame in starting out. If the trail is too steep, if the rocks are too frequent, if the conditions are too unfavorable (mud?), get off an push your bike. You can get on when it feels better. Or you can just walk the whole length and try again later.
Don’t forget to charge and bring your phone Nothing is likely to happen that would require you to phone home or 911, but even just taking a selfie of your beautiful self as a bike dork is reason enough.
Instead of shopping trails, stick with the same trail for a while. Find a trail that is a little too challenging for you, but not by much, and try over and over until it feels comfortable. Half the comfort will come from improvements in your riding, half of it from familiarity with the trail. When you are done and the trail feels too comfortable, move on to the next harder one.
For a while, uphill will be easier than downhill. You may have a hard time going up because you haven’t built stamina, just yet, but from a technical perspective, you’ll have an easier time keeping up with others uphill than downhill. In general, downhilling is more dangerous than uphilling, mostly because the speed are higher, but also because a mistake in uphilling usually results in a stop; while downhilling you accelerate.
The Sum of All Fears
I will not lie: mountain biking is a lot of fun, but it’s also pretty risky. If you don’t pay attention, there might be pain and suffering in your future, especially until you feel comforable and secure.
At the same time, in today’s environment and within a car-centric culture, mountain biking is oddly a safer alternative to road cycling for a lot of people. That is a real shame and I hope improvements to cyclist safety become a staple of political efforts. Until that happens, remember that most of the accidents on mountain bikes (or rather, off mountain bikes) are probably the rider’s own fault.
You may get injured, but at least not because a 2 ton behemoth sideswiped you because swiping a TikTok away was more important than your life.